User's Manuals / Allegro European Made Powerhead with Height Adjustment
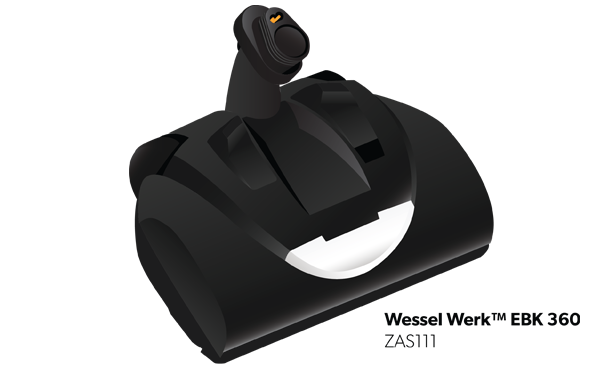
WESSEL-WERK EBK 360 ZAS111
Instruction Manual
IMPORTANT SAFEGUARDS
When using an electric appliance, basic precautions should always be followed, including the following:
WARNING Please read and save this Instruction Manual.
To reduce the risk of fire, electric shock or injury:
• Do not use outdoors or on wet surfaces • Do not leave nozzle plugged in. Turn off the switch, place handle in up position and unplug the electric cord when not in use and before servicing. If the nozzle is not working as it should, return it to the place of purchase. • Do not allow to be used as a toy. Close attention is necessary when used by or near children. • Use only as described in this manual. Use only manufacturer’s recommended attachments. • Do not use with damaged cord or plug. If nozzle is not working as it should because it has been dropped, damaged, left outdoors, or dropped into water, return it to a service center before using. • Do not pull or carry by electric cord, use cord as a handle, close a door on cord, or pull cord around sharp edges or corners. Do not run vacuum cleaner over cord. Keep cord away from heated surfaces. • Do not use use extension cords or outlets with inadequate current carrying capacity. • Turn off all controls before unplugging • Do not unplug by pulling cord. To unplug, grasp the plug, not the cord. • Do not handle electric plug or nozzle with wet hands. | | • Do not put any object into vacuum intake openings. Do not use with any opening blocked. Keep vacuum intake openings free of dust, lint, hair or anything that may reduce airflow. • This nozzle creates suction and contains a revolving brush roll. Keep hair, loose clothing, fingers and all parts of body away from openings and moving parts. • Do not place motorized nozzle on furniture or stairs as the brush roll may cause damage. Place nozzle on floor with the handle in storage position while using attachments. • Do not pick up anything that is burning or smoking such as cigarettes, matches or hot ashes. • Belt pulleys can become hot during normal use. To prevent burns, avoid touching the belt pulley when servicing the drive belt. • Use extra care with cleaning on stairs. • Do not use to pick up flammable or combustible liquids such as gasoline, or use in areas when they may be present. • Store your EBK 360 nozzle indoors in a cool, dry area. • Keep your work area well lit so you can see potential tripping hazzards. • Unplug electrical appliances before vacuuming them. |
Use & Care of your Electric Nozzle
[A] Attaching Wessel Werk® EBK 360 Electric Nozzle
To attach the telescopic wand with cord management (WTCR101), simply click the wand into EBK 360 neck assembly by lining up the direct connect terminals (See Figure. 1) on the powerhead with the corresponding recepticles on the wand.
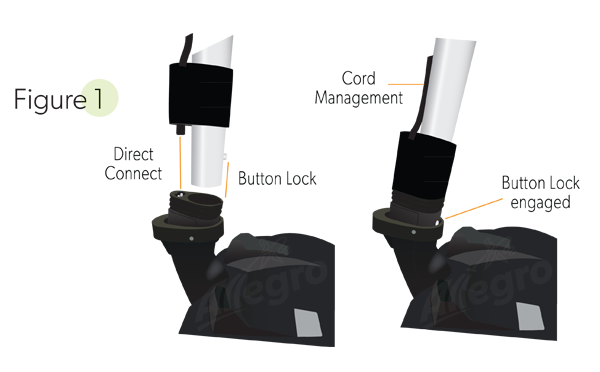
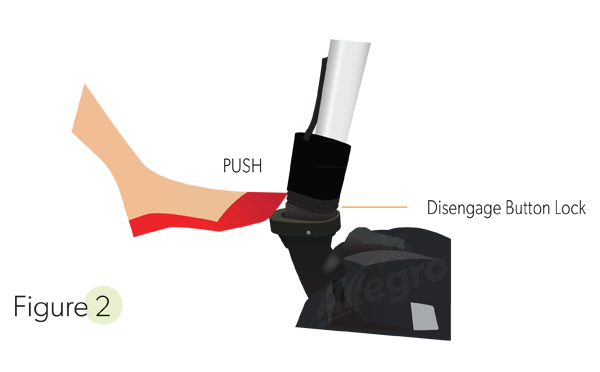
The button locking mechanism will prevent the wand from coming loose from you powerhead while in use. To depress the wand, depress the tab on the back of the neck assembly and pull wand free. (See Figure. 2)
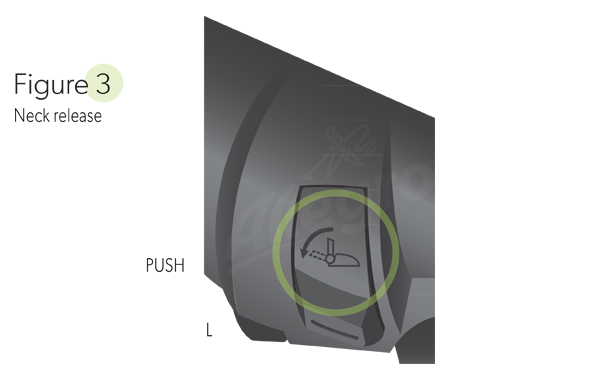
The wand can be locked in an upright position by pushing it forward until the lock is engaged. The locked position is convenient for storage and for lifting of the powerhead. To release wand from the vertical locked position, gently place foot on Powerhead (See Figure. 3), grasp wand and pull back firmly.
Now the nozzle is in operating position.
The nozzle will start once power is supplied. There is no ON/OFF switch.
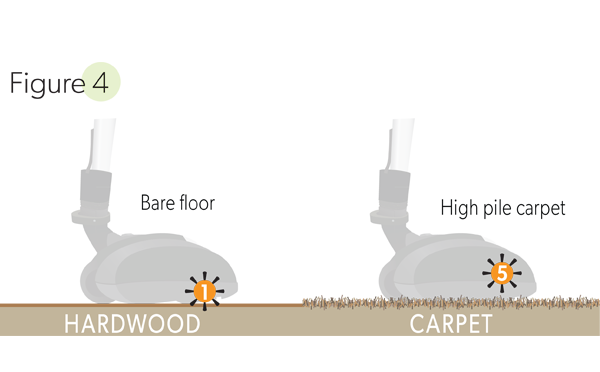
Depending on the surface area where your nozzle will be used, this powerhead has a 5-setting height adjustment for versatility for all floor types. Setting #1 is the lowest setting; Setting #5 is the highest. (See Figure. 4)
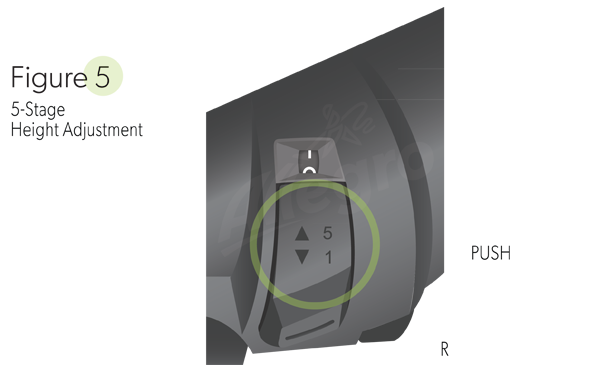
To change the height of the nozzle simply apply pressure to the height adjustment pedal with your toe (See Figure. 5). For best results is the lowest possible height setting.
If the nozzle is deemed too 'hard' to push across the carpet move the height adjustment setting up one position and review the ease of operation. Continue this operation one step at a time until the ease of operation is acceptable. NOTE: It is possible to raise the nozzle too high where effective cleaning will cease.
To achieve the best results when cleaning carpet, slowly pass the power nozzle back and forth over the area to be cleaned. To clean hard surfaces simply move the power nozzle over the area to be cleaned and set the nozzle to #1 height position, leave the vacuum on and have the power nozzle ON or OFF. It is best to avoid cleaning carpet fringes. When it is unavoidable, place the power nozzle over the carpet and pull toward you over the fringe.
Your nozzle is equipped with overload protection (circuit breaker). The circuit breaker will activate when the nozzle consumes more power than planned or an obstruction makes the brush hard to turn. If this occurs:
- Turn off the vacuum cleaner and disonnect the power supply cord.
- Remove the object that is preventing the brush from rotating.
- Please NOTE: 30-60 seconds of cool down time may be required for the circuit breaker to automatically reset.
- Reconnect the nozzle and proceed to clean.
ALWAYS UNPLUG THE NOZZLE FROM THE POWER SUPPLY FIRST!
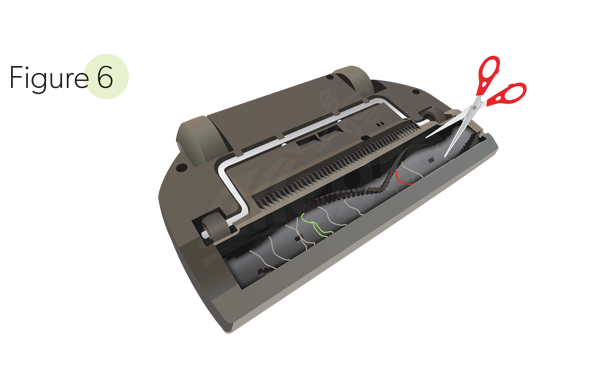
It may happen that your agitator brush becomes blocked or less effective. This may be the cause by excessive hairs and threads wrapped around the brush roller.
Insert the points of a pair of scissors under the hair / debris wrapped around the brush roller (See Figure. 6). Move the scissors to catch the threads and hairs in the scissors. Cut the threads of hairs and remove them manually or using a small sized pair of pliers.
If your nozzle ceases to pick up debris, check for an obstruction in the intake and or neck of the power nozzle. This can be caused when excessively large or long debris, like paper, a tooth pick or a sock is lodged in the intake and/or neck area of the nozzle.
To clear the obstruction, turn off all power supply to the nozzle. Remove the wand from the nozzle by depressing the button on the nozzle neck and pulling the wand apart (See Figure. 1). Look into the neck and remove any visible debris. Look into the intake area of the nozzle and remove and visible debris.
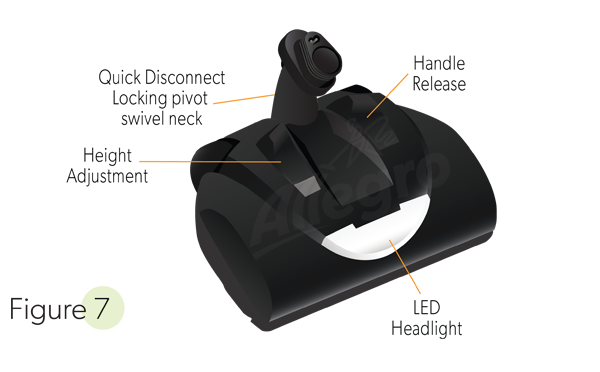
Wessel Werk® EBK 360 Electric Power Nozzle Part List
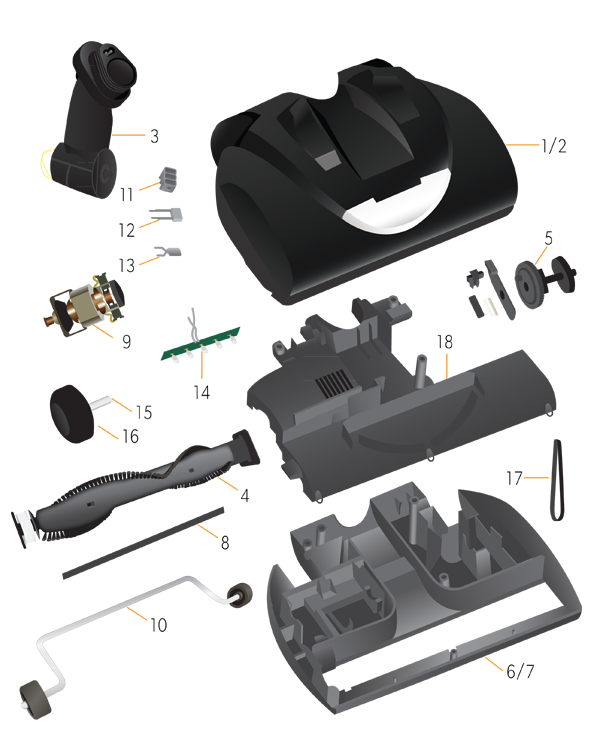
| Item No. | Part Description | Part No. |
| 1 | Cover Complete - Light Grey | 10.9 048-312 |
| 2 | Cover Complete - Black | 10.9 048-318 |
| 3 | QDC (Quick Disconnect) Neck Complete | 10.7 028-302 |
| 4 | Brush Roll Complete | 10.9 048-302 |
| 5 | Height Adjustment Assembly | 10.9 048-309 |
| 6 | Base Assembly Complete - Black | 10.9 048-319 |
| 7 | Base Assembly Complete - Light Grey | 10.9 048-313 |
| 8 | Wiper Blade | 12.1 848-06 |
| 9 | Motor Complete 120v | 10.9 048-314 |
| 10 | Front Wheels with Stirrup | 10.9 048-315 |
| 11 | Wire Coupler | 19.1 063-300 |
| 12 | Noise Reducer / Anti-Interference Capacitor | 19.1 041-301 |
| 13 | Circuit Protector | 19.1 071-301 |
| 14 | LED Light Bar Complete | 10.4 104-300 |
| 15 | Axle - Rear | 10.1 388-300 |
| 16 | Wheel - Rear | 10.4 105-301 |
| 17 | Belt - Cogged | 19.1 016-300 |
| 18 | Motor Cover | 10.1 367-300 |


